![Kangaroo-Rewards-App-Icon-BLUE-Oct-01-2025-07-47-23-2450-PM.png]](https://support.kangaroorewards.com/hs-fs/hubfs/Kangaroo-Rewards-App-Icon-BLUE-Oct-01-2025-07-47-23-2450-PM.png?height=40&name=Kangaroo-Rewards-App-Icon-BLUE-Oct-01-2025-07-47-23-2450-PM.png)
Before You Start
Before uploading your customer list, make sure your file meets the following requirements:
- The file must be in CSV format.
- Your customer list must contain at least one identifier for each customer:
- Phone number, or
- Email address
- Your file can include additional customer information, such as:
- First name
- Last name
- Address
- Tags
- Marketing consent
- And other available customer fields
The CSV file can contain a maximum of 20,000 customers.
How to Import Your Customers
1. Open the Import Customers Module
From the Kangaroo Business Portal:
- Go to Import Modules.
- Select Import Customers.
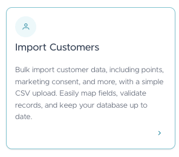
- Click Select File.
- Attach your CSV customer list.
Once the file is uploaded, the customer information will appear in a table.
2. Map Your Customer Fields
The first step after uploading your file is to map the fields.
Each column in your CSV file should be matched with the corresponding Kangaroo customer field.
For example:
- A column titled First Name should be mapped to First Name.
- A column titled Last Name should be mapped to Last Name.
- A column containing phone numbers should be mapped to Phone Number.
- A column containing email addresses should be mapped to Email.
If your CSV contains a column for which you do not have corresponding information or do not want to import the data, select Ignore Column.

Tip: Make sure each column is mapped correctly before continuing. Incorrect field mapping can result in customer information being imported into the wrong fields.
3. Choose Your Import Settings
After mapping the fields, choose how you want to import your customers.
Depending on your needs, you can choose to:
- Create new customers only
- Create new customers and update existing customer profiles
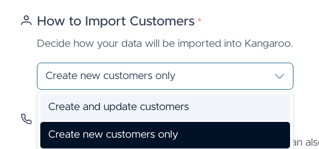
You can also configure additional settings, including:
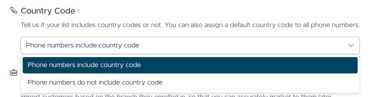
- Phone number settings. Whether phone numbers include a country code or Not
- Whether customers should receive the signup bonus

- Whether customers should receive the welcome message

- Other available import settings
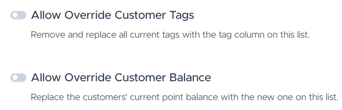
Review these settings carefully before starting the import.
4. Validate Your Import
Once all fields and settings are configured, click Validate Import at the top of the page.
Kangaroo will check your file and identify any:
- Errors
- Warnings
- Incorrect or missing field mappings

Review the validation results before starting the import.
Note: Some errors may not prevent you from uploading the file. For example, a customer may have a mobile phone number but no email address. If your import still meets the required identifier conditions, you may be able to continue.
If there are errors that need to be corrected, update your CSV file and upload it again.
5. Start the Import
Once your file has been reviewed and the fields are correctly mapped:
- Scroll to the bottom of the page.
- Click Start Import.
- Wait for the import to finish.
The import may take some time depending on the number of customers being uploaded.
Once the import is completed successfully, the status will appear in green with a Completed status.
Your customers have now been imported into your Kangaroo Business Portal.
Important Tips
- Always make sure your file is saved as a CSV before uploading.
- Make sure each customer has either a phone number or email address as an identifier.
- Do not exceed 20,000 customers per CSV file.
- Carefully review the field mapping before starting the import.
- Use Ignore Column for information you do not want to import.
- Review the validation results before starting the import.
- If you need to import more than 20,000 customers, split your customer list into multiple CSV files.
Imput formats:
- Email: example@example.com
- Phone: 212xxxzzzz or 1212xxxzzzz (No spaces, Dashes, "+", ...)
Make sure to select the options include or does not include country code before uploading.
- Birthday: mm/dd/yyyy (10/20/2026)
- Points: 10 - 100 - 1000
- Consent email or sms: Yes / No
