![Kangaroo-Rewards-App-Icon-BLUE-Oct-01-2025-07-47-23-2450-PM.png]](https://support.kangaroorewards.com/hs-fs/hubfs/Kangaroo-Rewards-App-Icon-BLUE-Oct-01-2025-07-47-23-2450-PM.png?height=40&name=Kangaroo-Rewards-App-Icon-BLUE-Oct-01-2025-07-47-23-2450-PM.png)
How vendor matching works
When a customer submits a receipt, the system extracts the store name printed on the receipt and compares it against your vendor allow-list. If the extracted store name matches one of your listed vendors, the receipt proceeds to the next step. If no match is found, the receipt is automatically rejected.
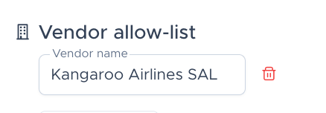
The matching is done against the name as it appears on the receipt (for example, "Kangaroo Airlines SAL"), so it is important to enter vendor names exactly as they appear on printed receipts. If a single store group has multiple name variations across its receipts, add each variation as a separate entry.

Adding a vendor
- Go to Settings → Receipt Scanning → Eligible Vendors.
- Type the vendor name in the Vendor name field.
- Click + Add vendor.
- Repeat for each additional vendor.
- Click Save settings when done.
Removing a vendor
Click the red delete icon next to the vendor name to remove it from the list.
Leaving the list empty
If the vendor allow-list is empty, receipts from any store are accepted (subject to your other rules). This is the default behavior and is appropriate for programs that are not store-specific.