Note: The email editor can be utilized for composing emails that do not include any offers attached to them.
How to create Email Templates:
Design and save some templates to be used in your future marketing campaigns
- Access the Kangaroo Editor from the left panel in the business portal.

- Start from scratch and begin designing the template with drag-and-drop elements, design customizations, image handling, and rich text editing.
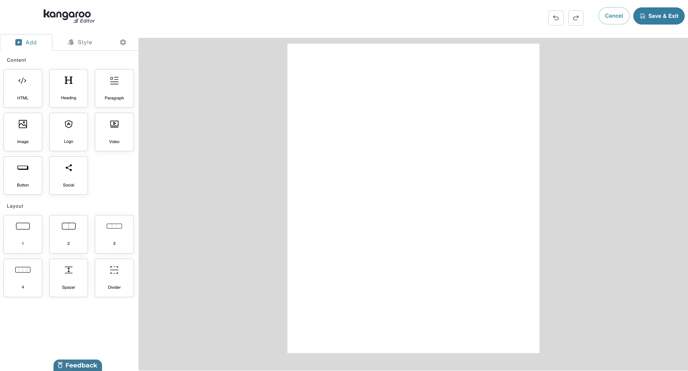
Add tab:
- HTML:
Utilize the drag-and-drop functionality to seamlessly incorporate HTML source code into your template, allowing for effortless implementation.
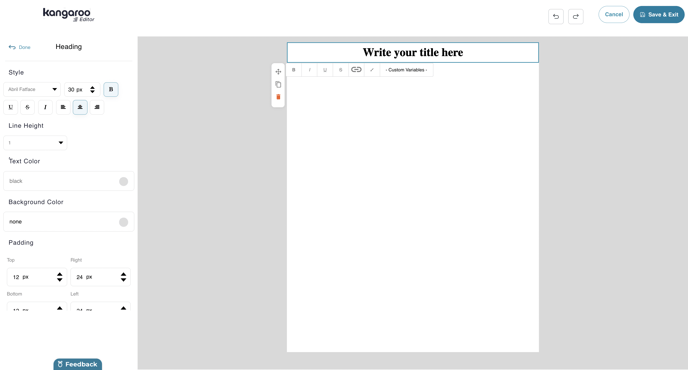
- Heading:
- Paragraph:
- Define and structure blocks of text within the email content
- Customize the font style and size of your heading by adjusting the pixel value through the intuitive up and down arrow controls.
- Enhance the formatting of your heading by applying various stylistic options such as bold, underline, italic, left alignment, right alignment, and center alignment. These features provide you with the flexibility to customize the appearance of your heading according to your preferences and design requirements.
- Modify the line height, text color, and background color of your content by utilizing the convenient color selection circle or directly inputting the color name. This user-friendly functionality allows for seamless customization, enabling you to achieve the desired visual aesthetics with ease.
- Use the Padding function to create space or distance between the content within the Heading or Paragraph and its border. - Image:
Once you upload an image, it will be saved in your account. Every time you open the editor, the asset manager popup will show all your previously uploaded images, making it easy for you to reuse them in your design.
Click on the "Add image" button to upload a new image or select from previously uploaded images.
- The Image can be linked to an external link by adding the source.
- The position of the image as well as the background color can also be changed.
- Use the Padding function to create space or distance between the content within the Image and its border. - Logo:
The Logo block automatically retrieves the business logo. If the your account does not have a saved logo, the Image of the main branch is utilized as the default Image

- Change the logo uploaded by clicking on Change and uploading a new image.
- The Logo can be linked to an external link by adding the source.
- The position of the image as well as the background color can also be changed.
- Use the Padding function to create space or distance between the content within the Logo and its border.
- Video:
When using the Video block, you have the option to select from two providers: YouTube and Vimeo. Upon selecting the desired provider, you can simply enter the video ID (not the entire link).
- Button:
- The Button can be linked to an external link by adding the source.
- Change the Corner Radius to change the degree of curvature applied to the corners of the button's border. This determines the roundness or smoothness of the button's corners.
-Modify the position, text color, and background color of your Button by utilizing the convenient color selection circle or directly inputting the color name.
- Use the Padding function to create space or distance between the content within the Button and its border. - Social:
The Social Media block in our email editor currently supports the automatic generation of Facebook, Instagram, and Twitter links. When adding the block, it dynamically retrieves the social media links provided in the business profile section, ensuring seamless integration and display of the corresponding social media icons and links.
- Create space between the social media icons by using the Spacing feature by adjusting the pixel value through the intuitive up and down arrow controls.
- Choose the alignment of the Icons and the background color.
- Use the Padding function to create space or distance between the content within the Social Media Icons and their border. - Layout:
Choose the overall structure and arrangement of content within an email template using the 4 different layouts. This defines the placement and organization of various elements such as text, images, buttons, and other components.
- Spacer:
Create space or gaps between different elements within the email template by using the Spacer.
Increase or decrease the Height of the spacer and change its Background Color.
- Divider:
Create a visual separation or dividing line between different sections or content blocks within the email template using the divider.
- Adjust the thickness of the divider to increase or decrease its prominence within the email design.
-Choose from different line styles such as solid, dashed, or dotted to customize the appearance of the divider, offering further flexibility in achieving the desired visual effect.
- Choose the color of the Divider by utilizing the convenient color selection circle or directly inputting the color name.
STYLE Tab:
Within this tab, you will find style settings for five component elements. Any style applied here will be automatically applied to all elements of the same block type. This includes both existing blocks and any new blocks added in the future. The automatic application of styles ensures consistency across all elements within a block, simplifying the process of maintaining a cohesive design throughout your email.
- Body
Change the background color of the whole body of the email template.
- Text
Select the text color, alignment, font style, and line height for any content to be automatically applied when added to ensure consistency and design cohesion. - Link
Choose the color of a link to be applied automatcially when added. - Buttons
Choose the button color, text color, button border, and border color of a button to be applied automatcially when added. - Divider
Choose the thickness, style, and color of a divider to be applied automatcially when added.
Settings Tab:

- Clear Canvas: clears canvas and starts from scratch.
- Import Code: opens code importer popup to import any HTML content.
- View Code: shows the code html/css.
Saving your template
Once you are done creating your template, Click on Save & Exit

Provide a title for your template to save and exit the creation process.
If you are editing an existing template, You will have the option to create a new one or override the existing one

How to Use Email Templates:
Once your template is created, make sure to use those temples in your marketing campaign
- Go to Marketing
- Start a new campaign
- Choose email as a delivery method
- Choose your targeted group of customers
- Continue without an offer
- You will have the option to Start from scratch (Refer to the section above for more information on how to use the email editor) or choose from a template

- Choose from template will allow you to choose between the default template or your own designed templates

- Save and Exit