- Help Center
- Kangaroo Apps
- Kangaroo Booking
-
Kangaroo Apps
-
Points
-
Redeeming points
-
Offers
-
Email/SMS/Push Marketing
-
Tiers
-
Referrals
-
Branding
-
Merchant App
-
Rules
-
Customers
-
Gamification
-
Gift Cards
-
Analytics
-
Branches
-
Kiosk
-
Frequent Buyers Program
-
Surveys
-
Business portal
-
API
-
White Label App
-
Subscription
-
Members App
-
FAQ
- Points
- FAQ- Lightspeed Retail
- FAQ- Shopify POS
- FAQ- Shopify ECOM
- FAQ- Lightspeed ECOM
- Lightspeed ECOM
- FAQ - WooCommerce
- FAQ - Standalone
- FAQ - BigCommerce
- FAQ - Magento
- Kangaroo Booking
- FAQ-Heartland
- FAQ - Judge.me
- FAQ- Lightspeed X Series
- FAQ- Lightspeed K Series
- FAQ- Lightspeed L Series
- FAQ - Lightspeed E Series (Ecwid)
-
One-Pagers
-
A La Carte
-
New Business Portal
-
Business Profile
-
Import Transaction
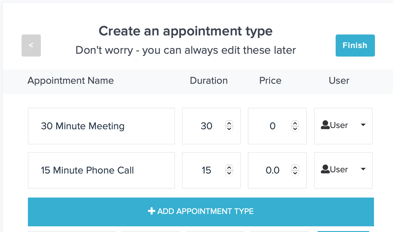
How to add an appointment when setting up a booking account
Create appointments to allow customers to get rewarded based on their bookings.
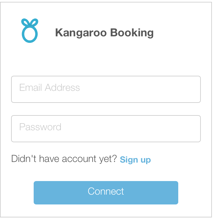
First, business needs to sign up by following the below steps:
- Click on the Apps & Integration section in the Business Portal.

- Sign up with the business' email to start setting up the appointment types.
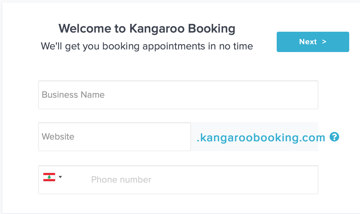
- Enter the business name along with the website and phone number and click on Next.
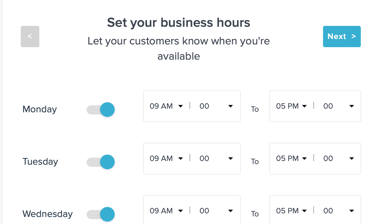
- Set up the business' hours so that customers know the opening hours. Once finished, click on Next.
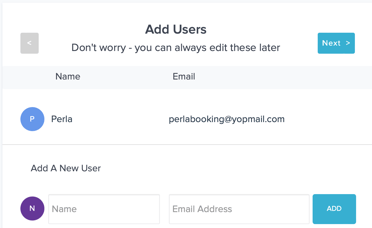
- Add all users' names and email addresses that would be attending the meeting. Users can always be edited. Once users are added to the meeting, click on Next.
- Create the appointment's type (appointments can be a video call, phone call...). Enter the meeting's name, duration, price and users. Finally click on Finish and the account will be set.